
How to Install Recessed Lighting
Recessed lights - also known as pot lights, can lights, or downlights - are a sought-after lighting choice that has revolutionized interior design.
It’s no wonder their popularity continues to grow; the minimalist lights evenly light a room without disrupting the aesthetic - hidden from sight for a stylish, sophisticated finish.
The flat recessed bulbs are fitted within a circular enclosure (typically four-inch or six-inch) in the ceiling and beam light downwards, either as task lighting or general lighting.
Almost all newly built homes have recessed lighting pre-fitted, but what if your home missed out or you want to install recessed lighting in a different part of your home?
We’ve got some good news: installing recessed lights is easier than you think, and it’s possible to do it in the space of an afternoon, even if you aren’t usually a DIYer. Installing recessed lighting is a cost-effective and modern way to update living spaces, shelving units, or hallways.
This article acts as a handy guide through the process, detailing how to install recessed lighting and explaining what parts you need to complete the job.
Before Installing, What Do I Need to Know
Safety First
Any DIY with electricals should be approached with caution. Before beginning, turn the light switch off, cut the power to the room at the main fuse, and use a voltage tester to ensure no electricity is flowing through the wires.
Disclaimer: If you think the installation is beyond your skillset, call a professional for a quote.
What Tools Do I Need?
- Drill with a hole saw attachment
- Drywall saw
- Needle-nose pliers
- 4-in-1 screwdriver
- Electrical tape
- Fish tape reel
- Hacksaw blade
- Hammer
- Non-contact voltage tester
- Right angle drill/driver
- Stepladder
- Stud finder
- Tape measure
- Utility knife
- Voltage tester
- Wire stripper/cutter
How long does it take?
Installing recessed lighting is fairly simple and should only take between 2-4 hours, depending on how many lighting fixtures you need.
How much does it cost to install recessed lights?
When going with the services of a professional, it typically costs between $240 to $280 per recessed lighting fixture. This translates to roughly $1,440 for six fixtures. Of course, your final total can vary depending on the type of housing, trim, and bulbs you decide to go with!
If you’re on a budget, there’s good news: with BAZZ products and the proper equipment, you can teach yourself how to install recessed lights for free.
Step 1: Wiring recessed lights: Find a circuit to provide power
Start by sawing a slot in the ceiling so you can access the ceiling joists and the top of the wall so you’ll be able to wire your recessed lights correctly. Then, ensure proper placement and cut holes for your recessed housings.
After this, locate an existing box to serve as a power source and turn off the power on the main electrical panel. Then, remove the box and fish a power cable through the hole to the new switch location.
Use a remodeling box with built-in cable clamps for your new switch box. Don’t mount the box until you’ve pulled your lighting cables through.
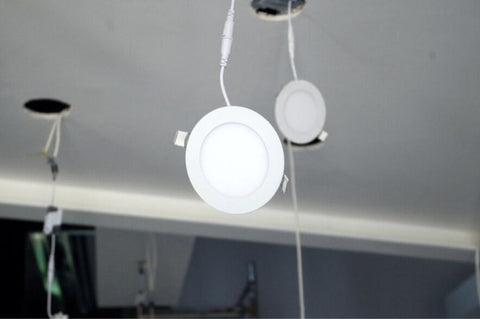
Step 2: Cut a Hole in the Ceiling
Measure your recessed lighting fixture to see how big the ceiling’s hole needs to be.
Trace a line around the fixture (typically four or six inches) on the ceiling and then use a drill with a hole saw attachment or a drywall saw to cut along the traced circle. Be careful not to cut any wires in the ceiling cavity.
Step 3: Rough-In the Wiring
Disconnect the existing light fixture (if one was already in place), and run a cable from the power source to a switch box and then to the hole you’ve just cut.
Step 4: How to Wire the Light
Open the recessed lighting fixture’s junction box and run the cabling into the box. For a BAZZ recessed lighting installation, connect the black wire to the coloured wire, white to white and bare copper to bare copper wire. A wire clip is recommended to keep the wires in place.
Once connected, fold the wires into the box and close the cover.
To run your cables through tougher areas, adhere them to a metal fish tape and simply tug them through the joist spaces.
Step 5: Mount the Smart Recessed Lighting Fixture and Trim
Now for the exciting part: it’s time to fit your recessed lighting fixture into the ceiling! Most models have clips attached that clamp onto the top of the ceiling. Pull the clips in as you push the lighting fixture through the hole and then release them.
To add the trim, follow the manufacturer’s instructions.
Step 6: Install the Smart Light Bulbs
Once the fixture is in place, simply fasten in your lightbulb of choice, and flick the light switch on to check the lights are working!
Buying Recessed Lights
We recommend you choose a smart lightbulb to infuse some extra life into your home. A smart light bulb lets you control power, brightness, colour, and routines all through your smartphone - anytime, anywhere.
If you already have standard recessed lighting in place but want to transform the lighting into smart WiFi RGB LED, use the BAZZ LED Conversion Kit. Simply remove your current bulb and trim, install the socket adapter (included), and screw in the LED bulb. Turn on and enjoy your new smart LED recessed lights. Magic!
At BAZZ Smart Home, we have Smart Recessed Lighting to match any need, from standard four-inch and six-inch recessed lighting to larger 14-inch recessed lighting fixtures. When paired with the accompanying BAZZ Smart Home app, your newly installed recessed lighting is controllable with the tap of a button, wherever you are!
